Best Apple Rhubarb Pie Recipe
There’s something magical about the combination of tart rhubarb and sweet apples baked together in a flaky pie crust. This apple rhubarb pie is my absolute favorite spring dessert, and I’ve been making it for years! The first time I tasted this combination, I was blown away by how perfectly the flavors complemented each other.
If you’ve never tried apple rhubarb pie before, you’re in for a real treat. Trust me, once you make this recipe, it’ll become your go-to dessert for potlucks, family dinners, and special occasions.
What Makes This Recipe So Good
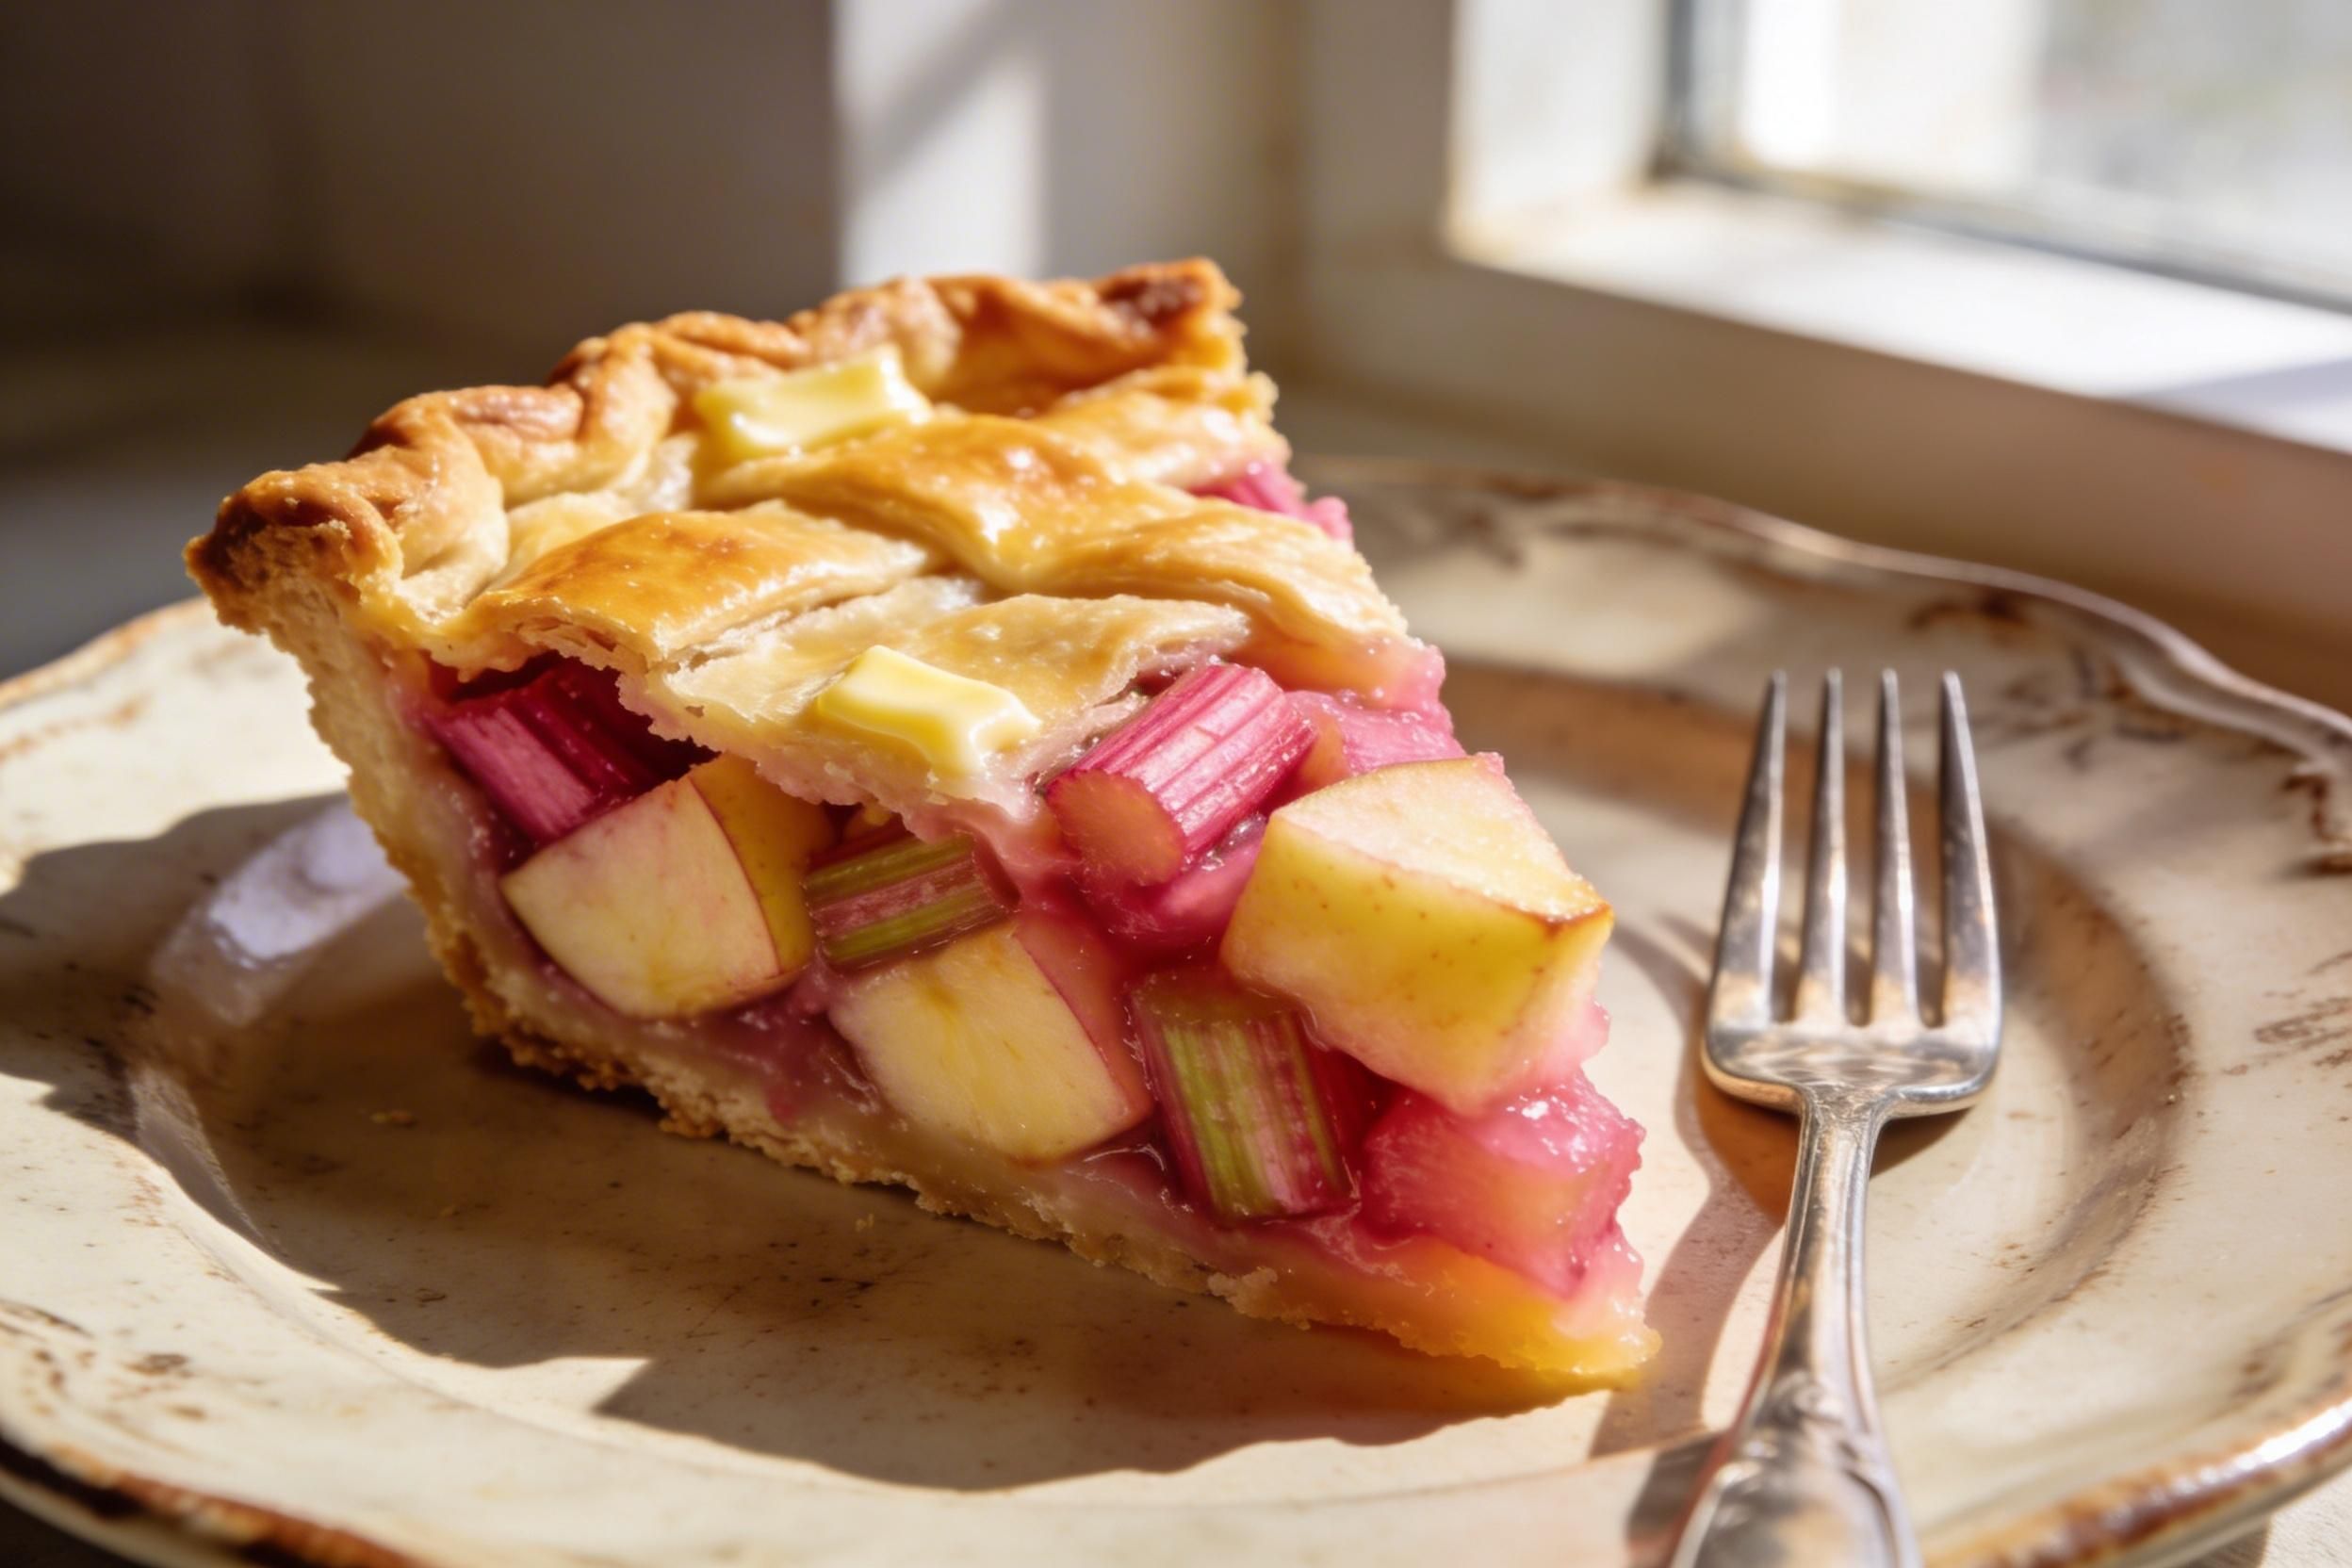
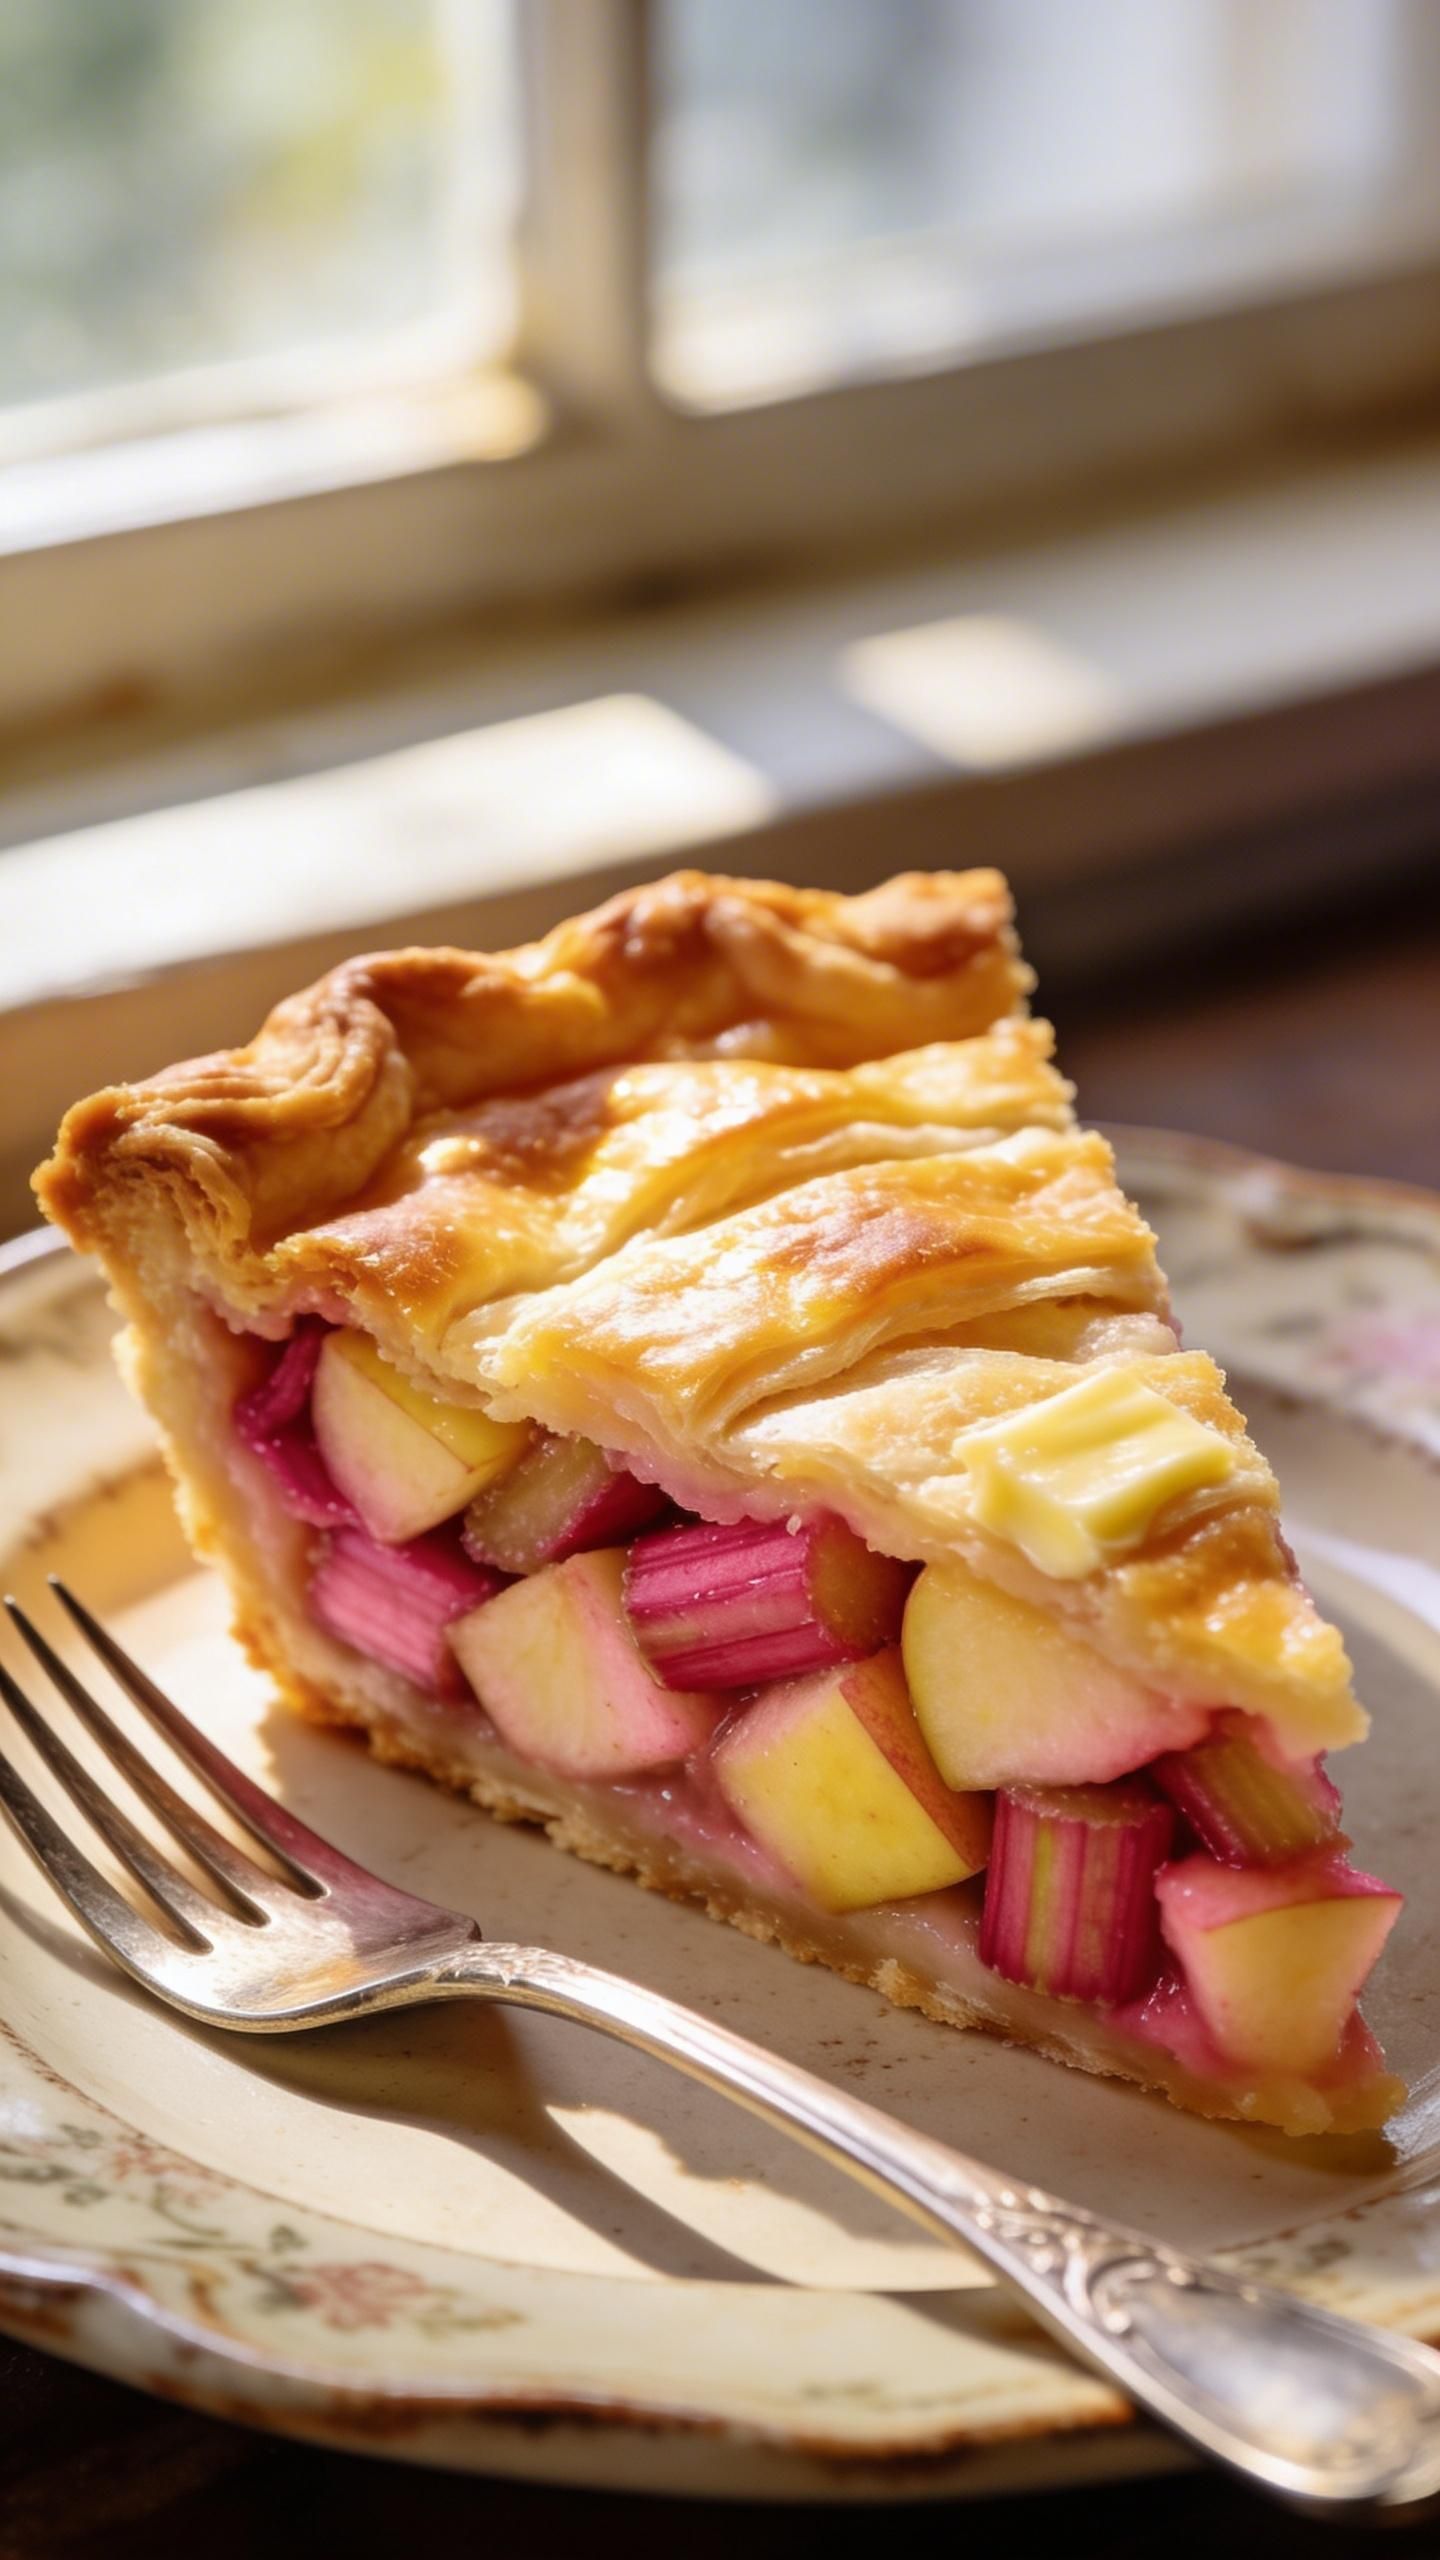
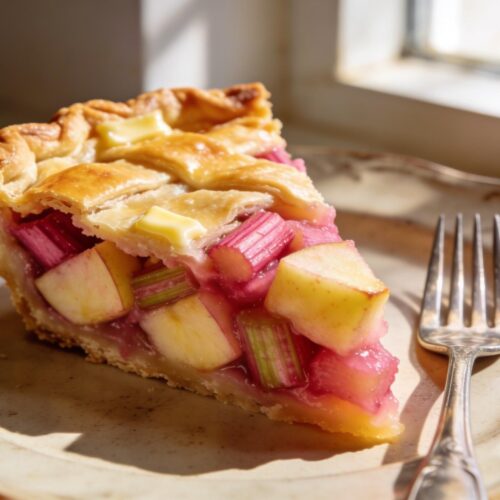
This apple rhubarb pie stands out because it achieves the perfect balance between sweet and tart. The apples provide natural sweetness and structure, while the rhubarb adds that distinctive tangy flavor that makes your taste buds dance. I’ve tested this recipe countless times to get the proportions just right.
The filling isn’t too runny or too thick—it’s absolutely perfect. Many pie recipes end up with a soupy mess or an overly dry filling, but this one hits the sweet spot every time. The secret is in the right amount of thickener and the proper ratio of fruit to sugar.
The crust is buttery, flaky, and holds together beautifully when you slice it. I use a simple technique that anyone can master, even if you’re not an experienced baker. Plus, this recipe doesn’t require any fancy equipment or hard-to-find ingredients.
Ingredients You Need
For the crust:
- 2½ cups all-purpose flour
- 1 tablespoon granulated sugar
- 1 teaspoon salt
- 1 cup (2 sticks) cold unsalted butter, cubed
- 6-8 tablespoons ice water
For the filling:
- 3 cups fresh rhubarb, cut into ½-inch pieces
- 3 cups peeled and sliced apples (Granny Smith or Honeycrisp work great)
- 1¼ cups granulated sugar
- ⅓ cup all-purpose flour
- 1 teaspoon ground cinnamon
- ¼ teaspoon ground nutmeg
- ¼ teaspoon salt
- 1 tablespoon lemon juice
- 2 tablespoons cold butter, cut into small pieces
- 1 egg, beaten (for egg wash)
- 1 tablespoon coarse sugar (optional, for topping)
How To Make My Apple Rhubarb Pie
- Prepare the pie crust: Mix flour, sugar, and salt in a large bowl. Cut in the cold butter using a pastry cutter or your fingers until the mixture resembles coarse crumbs. Add ice water one tablespoon at a time, mixing until the dough just comes together. Divide into two disks, wrap in plastic, and refrigerate for at least 30 minutes.
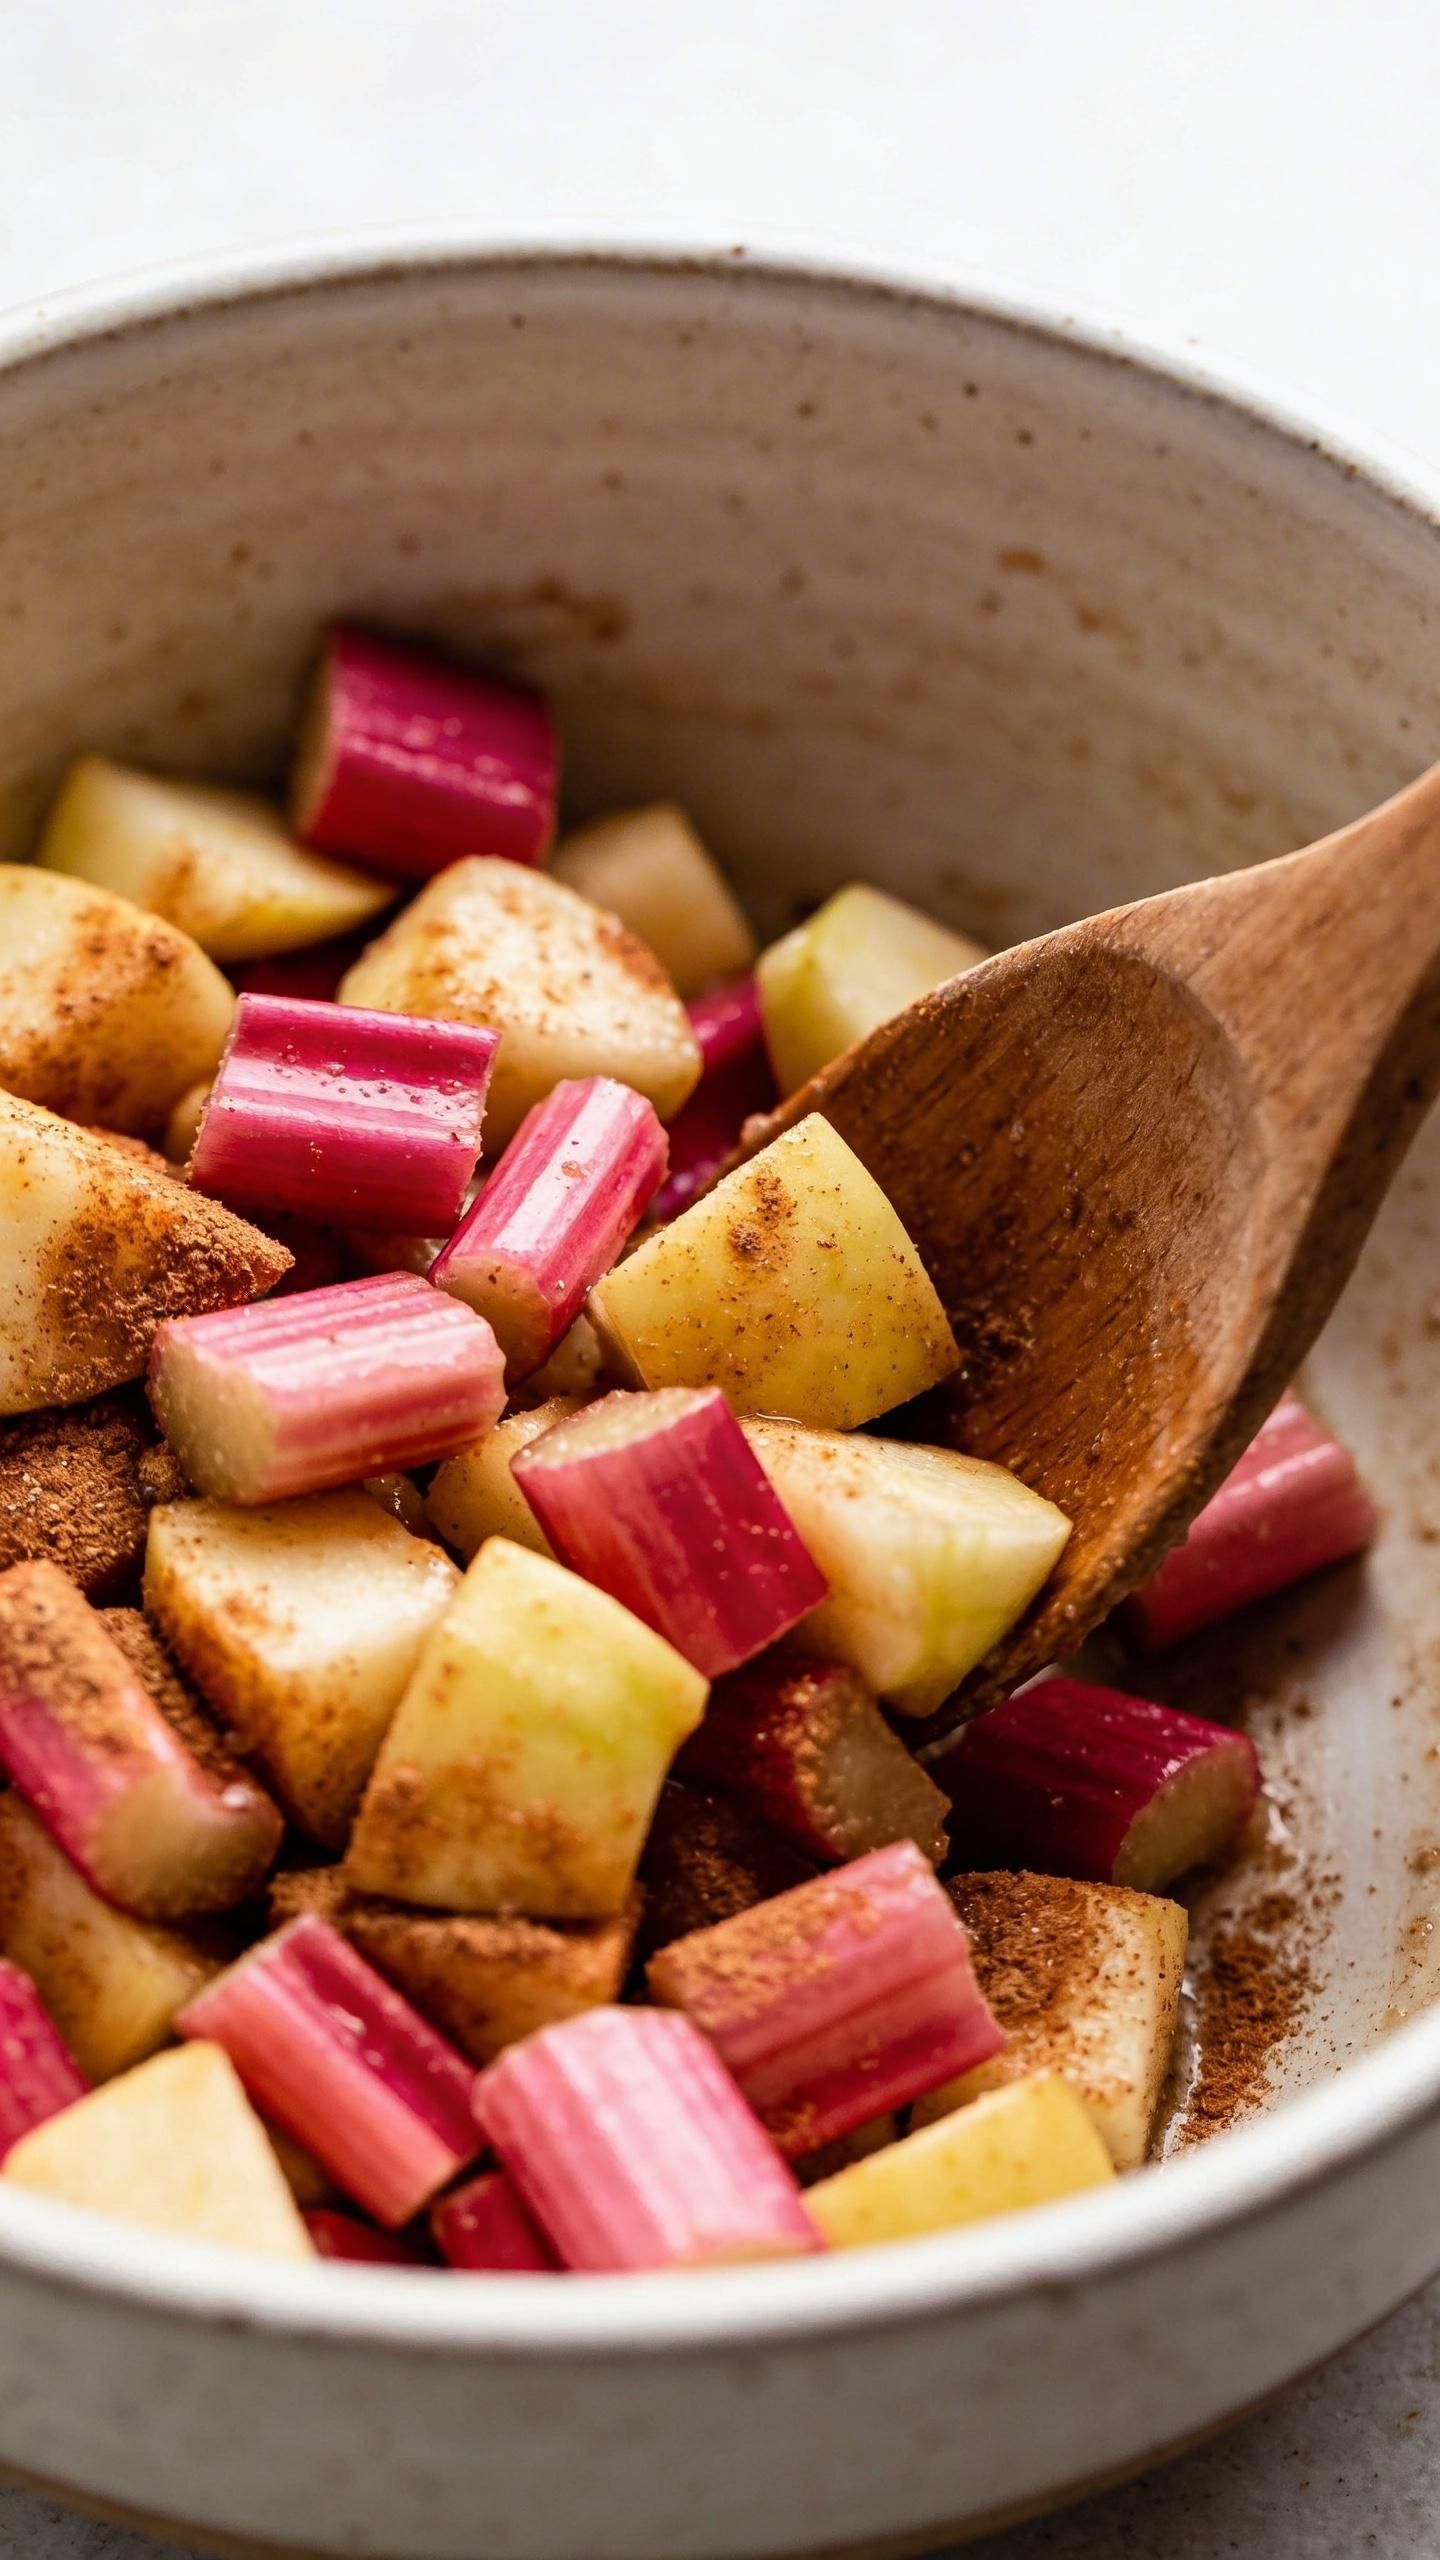
- Make the filling: Combine rhubarb and apples in a large bowl. In a separate bowl, whisk together sugar, flour, cinnamon, nutmeg, and salt. Pour the dry mixture over the fruit and add lemon juice. Toss everything together gently until the fruit is evenly coated.
- Roll out the bottom crust: On a floured surface, roll one disk of dough into a 12-inch circle. Transfer it to a 9-inch pie plate, letting the excess hang over the edges. Don’t trim it yet!
- Fill the pie: Pour the fruit mixture into the prepared crust, mounding it slightly in the center. Dot the top with small pieces of cold butter.
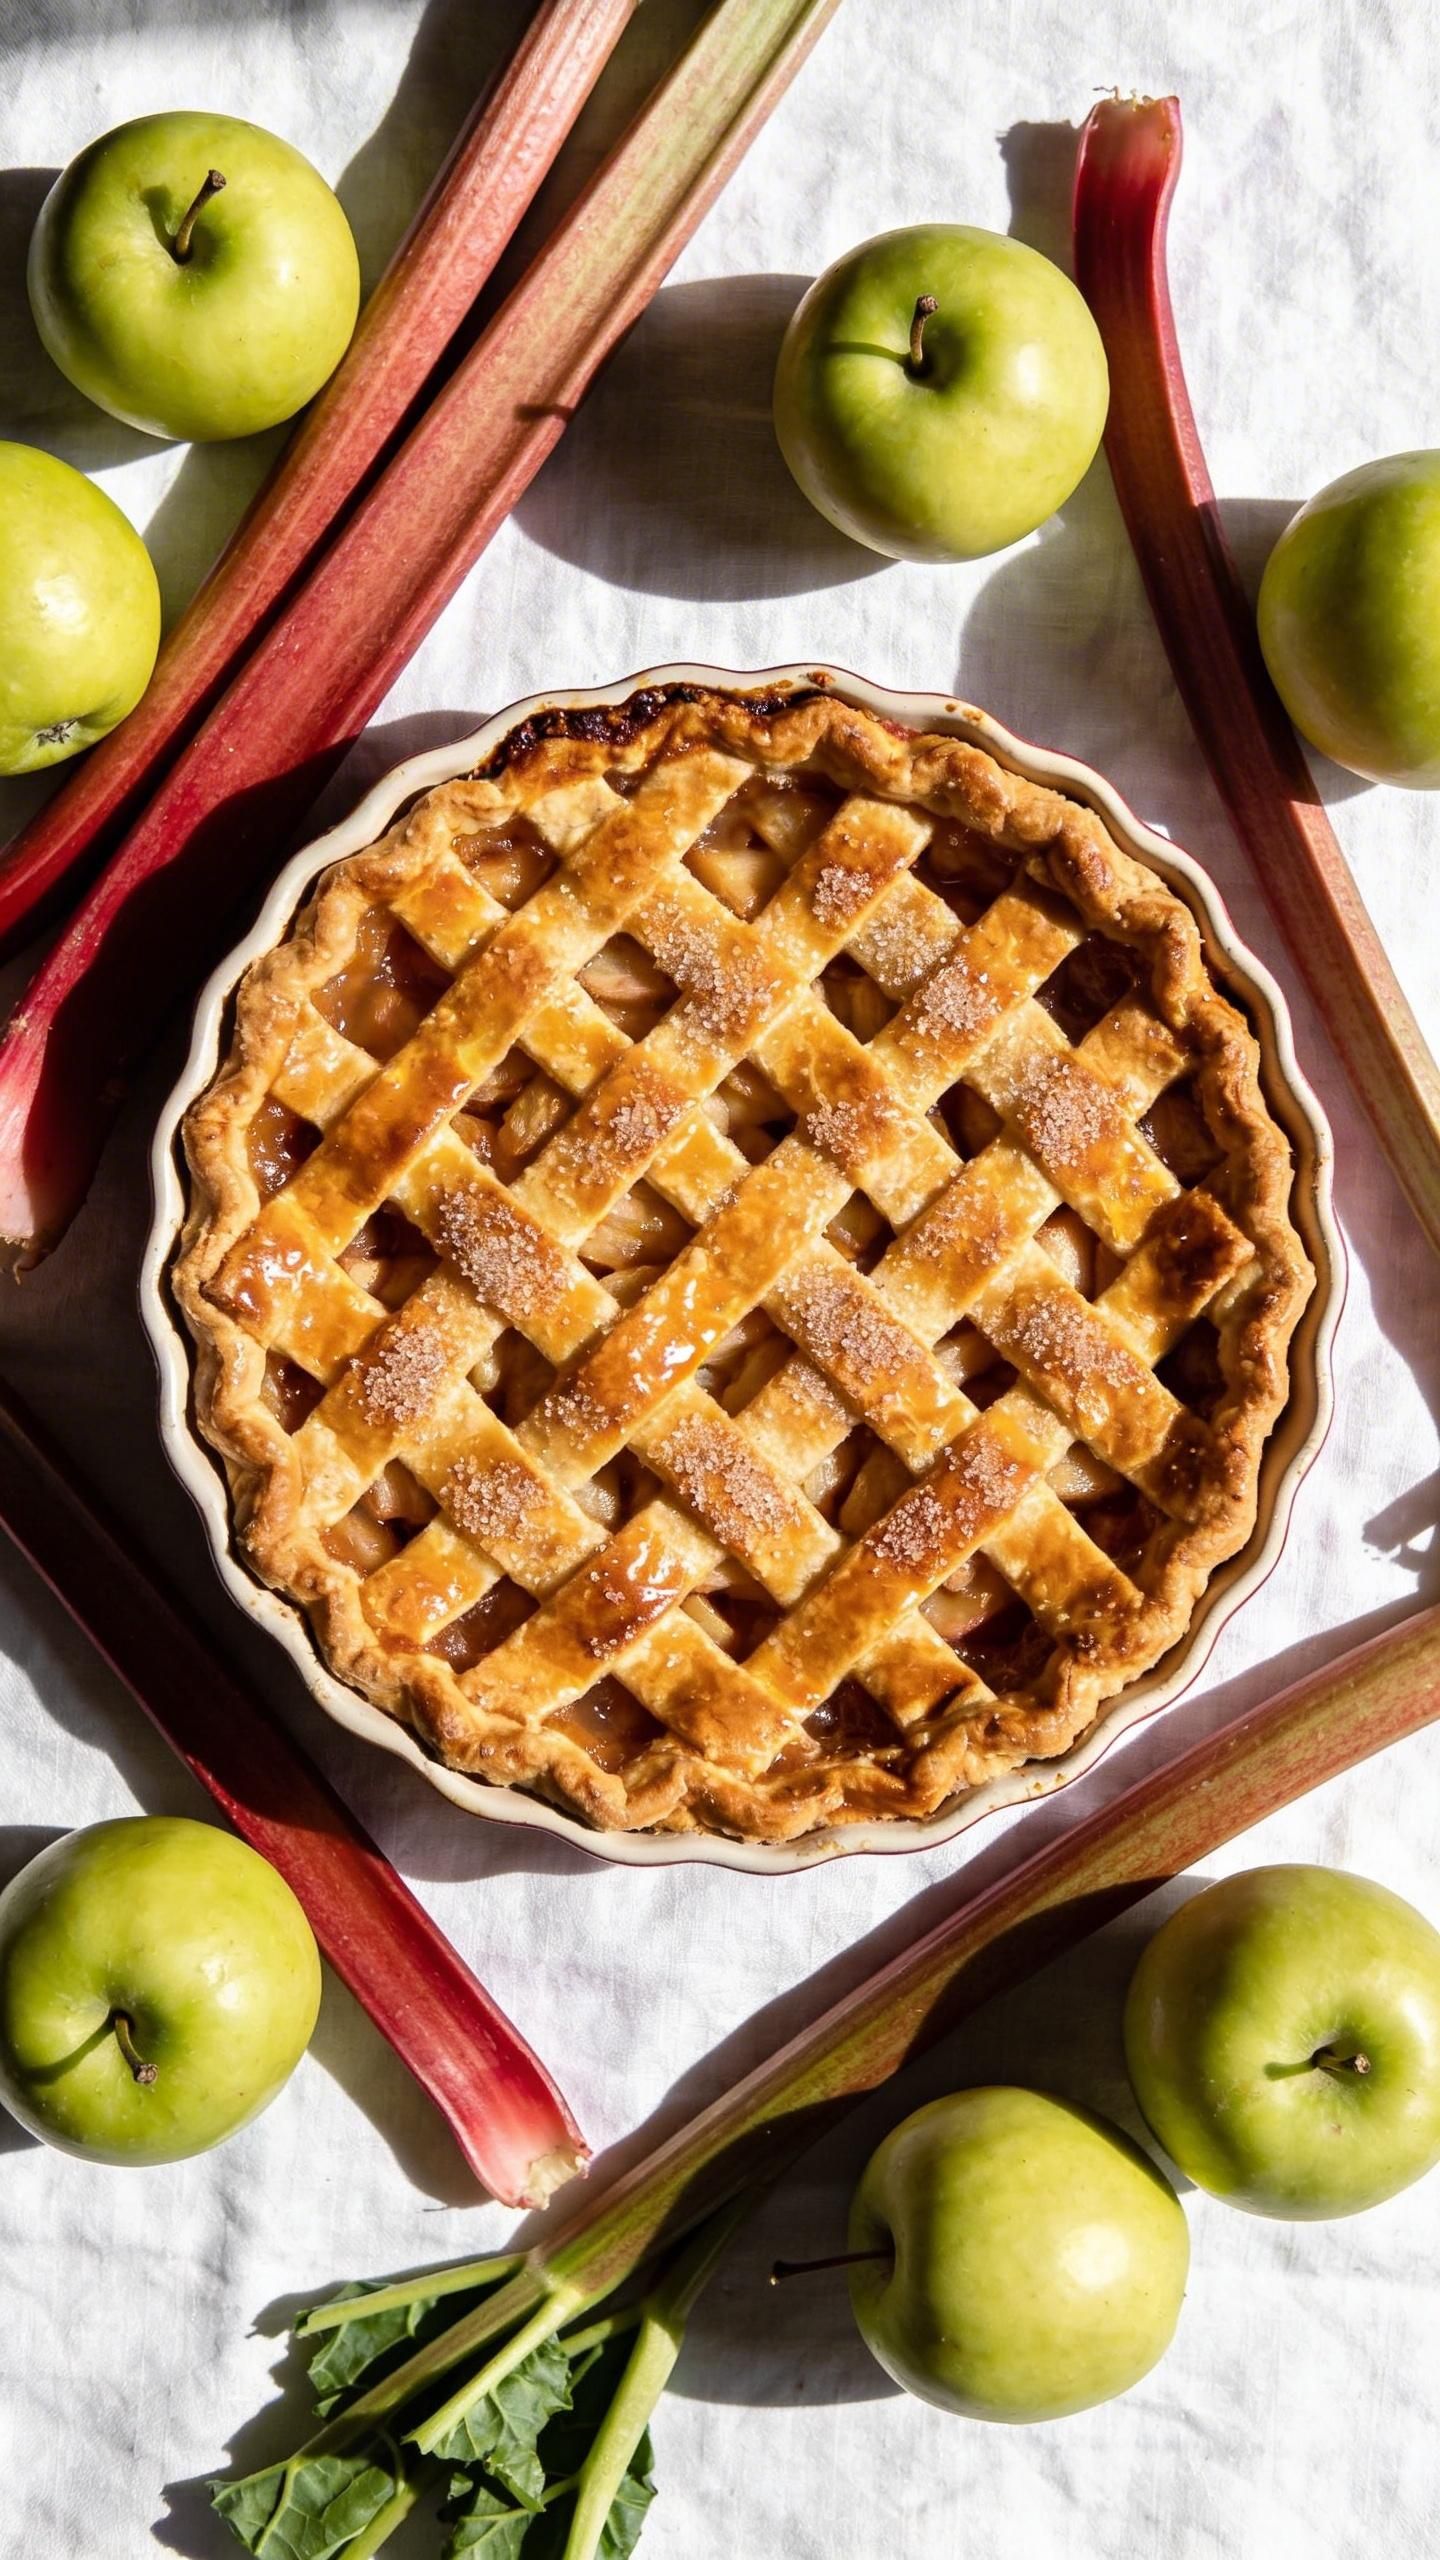
- Add the top crust: Roll out the second disk of dough and place it over the filling. You can create a lattice pattern or simply cover it completely with vents cut in the top. Trim the excess dough, leaving about ½ inch overhang, then crimp the edges together.
- Apply egg wash: Brush the top crust with beaten egg and sprinkle with coarse sugar if desired. This creates a beautiful golden finish.
- Bake the pie: Preheat your oven to 425°F. Place the pie on a baking sheet (to catch any drips) and bake for 20 minutes. Reduce the temperature to 350°F and continue baking for 40-50 minutes until the crust is golden brown and the filling is bubbling.
- Cool completely: Let the pie cool on a wire rack for at least 3-4 hours before slicing. I know it’s tempting to dig in right away, but the filling needs time to set properly!
Storage Instructions
- Room temperature storage: Cover the cooled pie loosely with aluminum foil and keep it at room temperature for up to 2 days. This works great if you plan to eat it quickly!
- Refrigerator storage: For longer storage, cover the pie and refrigerate it for up to 5 days. The crust may soften slightly, but the flavor remains delicious.
- Freezing baked pie: Wrap the completely cooled pie tightly in plastic wrap, then in aluminum foil. Freeze for up to 3 months. Thaw overnight in the refrigerator before serving.
- Freezing unbaked pie: You can also freeze the assembled, unbaked pie. Wrap it well and freeze for up to 3 months. Bake directly from frozen, adding about 15-20 minutes to the baking time.
- Reheating slices: Warm individual slices in a 350°F oven for about 10 minutes to restore some of the crust’s crispness. Microwave reheating works in a pinch but makes the crust soggy.
Benefits Of This Recipe
- Seasonal flexibility: This recipe works beautifully with fresh spring rhubarb or frozen rhubarb year-round. You don’t have to wait for rhubarb season to enjoy this amazing pie!
- Beginner-friendly: Even if you’ve never made pie before, this recipe is straightforward and forgiving. The instructions are clear and easy to follow.
- Crowd-pleaser: The combination of flavors appeals to almost everyone. I’ve served this to picky eaters and adventurous foodies alike, and everyone loves it.
- Make-ahead option: You can prepare the dough and filling components ahead of time, making it perfect for busy schedules or holiday planning.
- Nutritional value: Rhubarb is packed with vitamin K, calcium, and antioxidants. While this is still a dessert, at least you’re getting some nutritional benefits from the fruit!
- Budget-friendly: The ingredients are simple and affordable, especially if you grow your own rhubarb or buy apples in season.
Pitfalls To Watch Out For
- Soggy bottom crust: Make sure your oven is fully preheated before baking. Starting at a higher temperature helps set the bottom crust quickly. You can also blind-bake the bottom crust for 10 minutes if you’re worried about sogginess.
- Runny filling: Don’t skip the flour in the filling—it’s essential for thickening. Also, make sure you let the pie cool completely before slicing, or the filling won’t have time to set properly.
- Tough crust: Overworking the dough develops gluten, which makes the crust tough. Mix just until the dough comes together, and handle it as little as possible.
- Burnt edges: If the crust edges brown too quickly, cover them with aluminum foil or a pie shield halfway through baking. This protects them while the filling finishes cooking.
- Using warm butter: Cold butter is crucial for a flaky crust. If your kitchen is warm, chill your mixing bowl and even the flour beforehand.
- Cutting the rhubarb too large: Keep the pieces around ½ inch so they cook evenly and blend well with the apples.
Alternatives
- Strawberry rhubarb variation: Replace one cup of apples with fresh strawberries for a classic strawberry rhubarb twist. Reduce the sugar slightly since strawberries are sweeter.
- Crumb topping: Skip the top crust and use a streusel topping instead. Mix ¾ cup flour, ½ cup brown sugar, ½ cup oats, and ½ cup melted butter for a delicious alternative.
- Gluten-free version: Use your favorite gluten-free flour blend for the crust. Make sure it includes xanthan gum for proper binding.
- Different apple varieties: Try mixing apple types for more complex flavor. Granny Smith adds tartness, while Honeycrisp or Gala brings sweetness.
- Spice variations: Add ¼ teaspoon of ground ginger or cardamom for a unique flavor profile. A pinch of vanilla extract in the filling also works wonderfully.
- Individual pies: Make hand pies or mini pies using the same filling. Adjust baking time to about 25-30 minutes for smaller portions.
Frequently Asked Questions
Can I use frozen rhubarb for this apple rhubarb pie?
Absolutely! Frozen rhubarb works perfectly in this recipe. Don’t thaw it before using—just add it frozen to prevent excess moisture. You might need to add a few extra minutes to the baking time.
Why is my apple rhubarb pie filling runny?
The most common reason is not letting the pie cool completely before slicing. The filling needs at least 3-4 hours to set properly. Also, make sure you’re using the correct amount of flour as a thickener and that your oven temperature is accurate.
What’s the best apple to use for apple rhubarb pie?
Granny Smith apples are my top choice because they hold their shape well and provide a nice tart contrast. Honeycrisp and Braeburn also work great. Avoid Red Delicious or McIntosh as they become too mushy when baked.
Do I need to peel the rhubarb?
No, you don’t need to peel rhubarb stalks. The skin is edible and softens during baking. Just wash the stalks well, trim off any leaves (which are toxic), and cut into pieces.
Can I reduce the sugar in this recipe?
You can reduce the sugar by about ¼ cup if you prefer a less sweet pie, but I wouldn’t go lower than that. Rhubarb is quite tart, and the sugar helps balance that tartness. The sweetness of your apples will also affect how much sugar you need.
How do I prevent the pie crust from shrinking?
Make sure to chill the dough thoroughly before rolling it out. Don’t stretch the dough when fitting it into the pie plate—gently press it in instead. Chilling the assembled pie for 15 minutes before baking also helps prevent shrinkage.
Can I make the pie crust ahead of time?
Yes! You can make the dough up to 3 days in advance and keep it refrigerated, or freeze it for up to 3 months. Thaw frozen dough overnight in the refrigerator before using.
Wrapping Up
This apple rhubarb pie recipe has become a staple in my kitchen, and I hope it becomes one in yours too! The combination of sweet apples and tangy rhubarb creates a flavor experience that’s hard to beat. Whether you’re making it for a special occasion or just because you’re craving something delicious, this pie never disappoints.
The beauty of this recipe is its versatility and ease. You can customize it to your preferences, make it ahead, and even freeze it for later. Don’t be intimidated if you’re new to pie-making—just follow the steps, and you’ll have a gorgeous, delicious dessert that’ll impress everyone.
So grab some rhubarb and apples, and get baking! Your kitchen will smell amazing, and your family will be asking for seconds. Happy baking!
Best Apple Rhubarb Pie Recipe
Ingredients
For The Crust
- 2½ cups all-purpose flour
- 1 tablespoon granulated sugar
- 1 teaspoon salt
- 1 cup 2 sticks cold unsalted butter, cubed
- 6-8 tablespoons ice water
For The Filling
- 3 cups fresh rhubarb cut into ½-inch pieces
- 3 cups peeled and sliced apples Granny Smith or Honeycrisp work great
- 1¼ cups granulated sugar
- ⅓ cup all-purpose flour
- 1 teaspoon ground cinnamon
- ¼ teaspoon ground nutmeg
- ¼ teaspoon salt
- 1 tablespoon lemon juice
- 2 tablespoons cold butter cut into small pieces
- 1 egg beaten (for egg wash)
- 1 tablespoon coarse sugar optional, for topping
Instructions
- Prepare the pie crust: Mix flour, sugar, and salt in a large bowl. Cut in the cold butter using a pastry cutter or your fingers until the mixture resembles coarse crumbs. Add ice water one tablespoon at a time, mixing until the dough just comes together. Divide into two disks, wrap in plastic, and refrigerate for at least 30 minutes.
- Make the filling: Combine rhubarb and apples in a large bowl. In a separate bowl, whisk together sugar, flour, cinnamon, nutmeg, and salt. Pour the dry mixture over the fruit and add lemon juice. Toss everything together gently until the fruit is evenly coated.
- Roll out the bottom crust: On a floured surface, roll one disk of dough into a 12-inch circle. Transfer it to a 9-inch pie plate, letting the excess hang over the edges. Don’t trim it yet!
- Fill the pie: Pour the fruit mixture into the prepared crust, mounding it slightly in the center. Dot the top with small pieces of cold butter.
- Add the top crust: Roll out the second disk of dough and place it over the filling. You can create a lattice pattern or simply cover it completely with vents cut in the top. Trim the excess dough, leaving about ½ inch overhang, then crimp the edges together.
- Apply egg wash: Brush the top crust with beaten egg and sprinkle with coarse sugar if desired. This creates a beautiful golden finish.
- Bake the pie: Preheat your oven to 425°F. Place the pie on a baking sheet (to catch any drips) and bake for 20 minutes. Reduce the temperature to 350°F and continue baking for 40-50 minutes until the crust is golden brown and the filling is bubbling.
- Cool completely: Let the pie cool on a wire rack for at least 3-4 hours before slicing. I know it’s tempting to dig in right away, but the filling needs time to set properly!